Adding fire to your videos
When Scabbers is not taking tea with Lavender at the club, they sneek out to the woods and plot how to TAKE OVER THE WORLD. But it's cold in the wood, and it's no fun plotting when you're cold, so Scabbers needs a nice fire to keep them warm.
We don't want to light a real fire in out living room though, so what can we do? In this post, we'll show you how to add fire from stock footage to your video.
Build your scene with the fire in mind
It's important to think about the fire while we build our scene. We've all seen videos where it's obvious that elements have been added digitally because they stick out like a sore thumb. We want to avoid that. We don't want the viewer to notice that we fire had been added in later, but rather believe that the fire was really present in the scene when we shot it.
We obviously can't have real fire in our scene, but we can have firewood and a fire pit. We used a jar lid as a fire pit and filled it with cook's matches (the large ones), which we didn't light, of course. The flammable ends are at the bottom, so we don't see them. You could use anything that you have lying around that looks a bit like firewood.
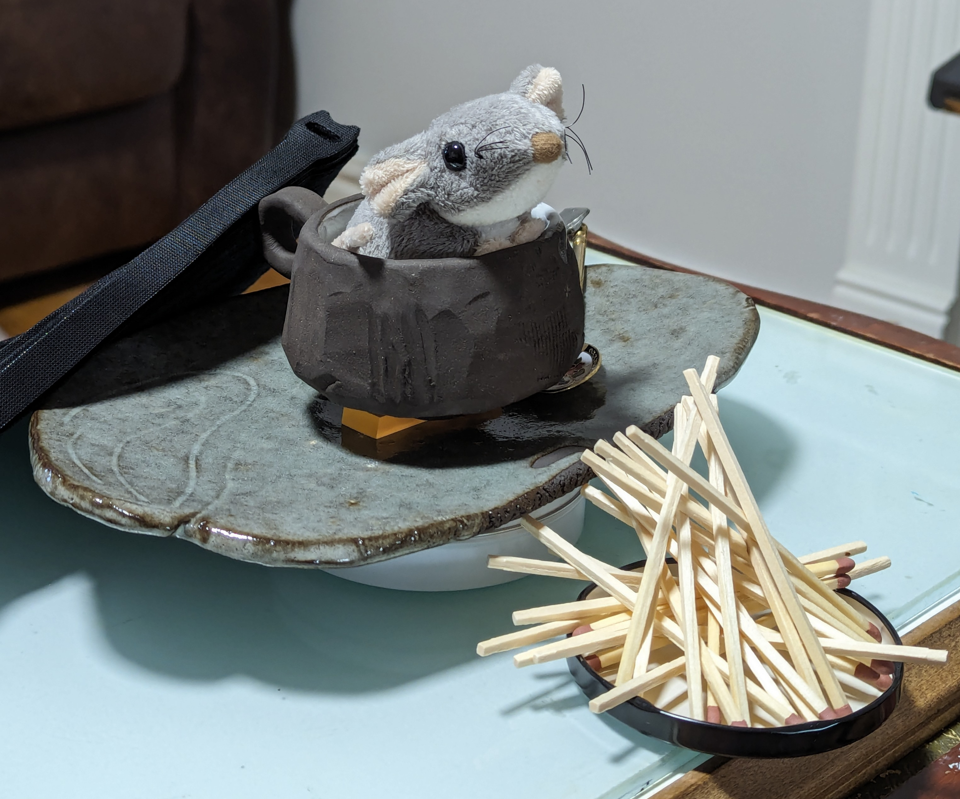
We didn't have a lot of time, and so we just used the matches as they came out of the box, but it would be better to colour they with black/grey felt tip pen, so that they look like they've been burnt by the fire.
Simulate the fire light
A real fire would be casting flickering light onto Scabbers, but without any real fire in the scene, this would be absent. We don't want the viewer to subconsiously pick up on the fact that the fire isn't casting any light.
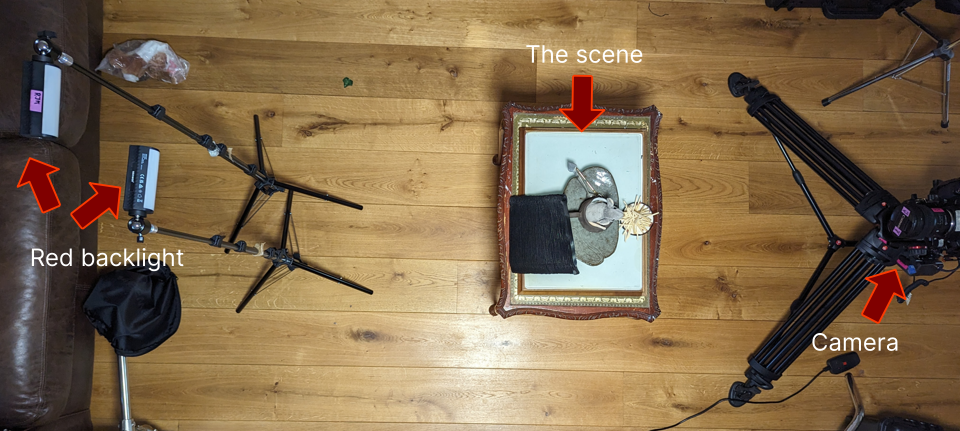
To solve this, we simulated the fire light by holding a flickering orange light behind the camera. The cheap NEEWER TL96 lights, that we mentiond in our previous blog post have a "FIRE" setting, which provides a flickering orange light. But, it you don't have a light like this, you could use a torch and wrap it in an orange plastic bag, or a clear food bag coloured with orange pen. If you move it around, or wave your fingers in front of it, you can make the light flicker.
Add smoke
It's a cold, foggy night in the forest, and there would be a lot of smoke blowing around from the fire, so we used the same smoke machine that we used in our previous blog post to add some smoke in the background. We added quite a lot, as we were going for quite an exaggerated look, but you could be more subtle, if that's the vibe you're going for.
Camera and light setup
We backlit with two of the NEEWER TL96 lights set to red at a high intensity; we keep them quite high up, so they are not in frame. We mounted the camera low, below Scabbers, and tilted the lens up at them to give them a powerful/threatening feeling.
Adding the fire
The last step is to get the video off our camera and onto the computer so we can add in the fire.
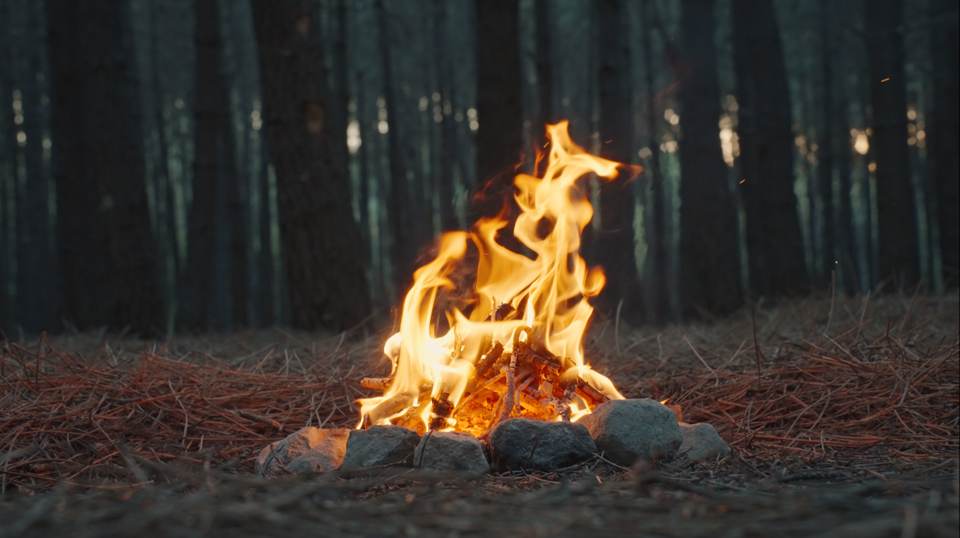
First of all, find some video of fire the works with your scene. You need to find a clip which matches your scene and where the camera is not moving; if the camera is moving, you will have a very hard time trying to match it to your video.
💡Top tip: Find your fire footage before you film your scene. That way you can make sure that they're filmed from similar enough camera angles and adapt your scene to match the footage.
We used the clip below; you could use anything you can find that has the look you're going for. Clips of fire are very common; for example this one, available for free on Pexels could be suitable; if you search for "Fire" on Pexels, and similar sites, there are lots of options.
Sometimes it can be hard to add elements to a video without them looking "stuck on" or it can be hard to separated the element from the background in the first place. The nice thing about fire is that it is so much brighter than the background, the it can be pretty easy to work with.
If you're lucky, you might find a clip which is just fire against a black background; in this case, you can just overlay it in your editing app, position it where you want it and set the blend/composition mode to "Add" or "Screen" and that might be good enough.
In our clip, the background is actually quite visible, so we need to remove it. It's still quite a lot darker than the fire, so we used something called a "Luma key" (or "Luminance key"). This just sets the transparency of each pixel equal to its brightness; so black pixels are fully transparent and bright pixels are fully opaque and anything in between is semi-transparent. With that done, we can just overlay the fire footage, and the background pixels are sufficiently transparent that we can't even see them.
Using a simple technique like this to blend the fire into our video gives a much more natural look, and is a lot simipler, than other techniques for background remove that don't tend to work well without something like fire, which has a complex organic outline.
Music!
Finally, we need to add some music that is suitable malevolent. If you making a video for TikTok or Instagram, there is is plenty of copyrighted music available in the app that you could use. If you're publishing elsewhere, (e.g. on YouTube) then this may not be an option.
Rather than paying to use a commerical music track, you could use classical music for a video like this; classical-sounding music is often used in horror films and there are a lot of recordings available in the public domain. You can use these without having to pay.
We used this public-domain recording of Carl Orff's "O Fortuna", which sounds very similar to the music from the cult horror film "The Omen". It's often used in parody horror skits, probably because they can't get the rights to the film soundtrack!
Edit and upload
Now all you have to do is finalize your edit and upload to your favourite platforms.
If you live in and around the South Bucks (U.K.) area and you want to get more practice filming and editing your own videos, why not join us for one of our courses during the school holiday?